Engraving Offset and Ghosting Troubleshooting Guide
1. Problems Found
Two issues may occur independently or at the same time:
|
Symptom |
Appearance |
Reference Image |
|
Bidirectional engraving ghosting |
Vector graphics appear doubled, and raster graphics look blurred. For example, “THUNDER” may appear as overlapping letters.
|
|
|
Unidirectional engraving offset |
The entire fill layer(s) shifts from its intended position. In these tests, the fill layer shifted to the left while line layer(the cutting frame) remained at its original position. Or it might be opposite: line layer shifts to the right while the fill layer remains.
|
|
2. Cause Analysis
These issues are associated with Scanning Offset Adjustment function and Lightburn software's compatibility with Thunder machines. The test results do not, by themselves, indicate hardware damage.
During bidirectional engraving, the laser fires on both the forward and return passes. A small difference between the positions of the two scan directions can result in doubled edges, which appears as ghosting.
During unidirectional engraving, the laser fires in one direction and returns without firing. If the start-position compensation does not match the current scan buffer, the entire image may shift.
LightBurn’s Scanning Offset Adjustment provides two relevant settings:
- Line Shift compensates for the difference between forward and return scan lines, primarily addressing bidirectional ghosting. This compensation is applicable to all laser control software (LightBurn, RDWorks, and LaserMaker) and is used to optimize bidirectional engraving.
- Initial Offset compensates for a shift in the starting position of the engraving. It is primarily used to correct the overall offset that may occur during unidirectional engraving.
Note: These issues are more noticeable on the Titan series because Titan machines operate at higher speeds and acceleration rates, resulting in relatively larger scanning offset compensation values.
However, similar issues may also occur on other models, such as the Nova and Bolt series. The same troubleshooting methods and adjustment guidelines below can be used to test, identify, and resolve these issues.
3. Troubleshooting and Corrective Actions
Select the procedure corresponding to the engraving mode you use most frequently:
Method A: Primarily Using Bidirectional Engraving for Higher Speed
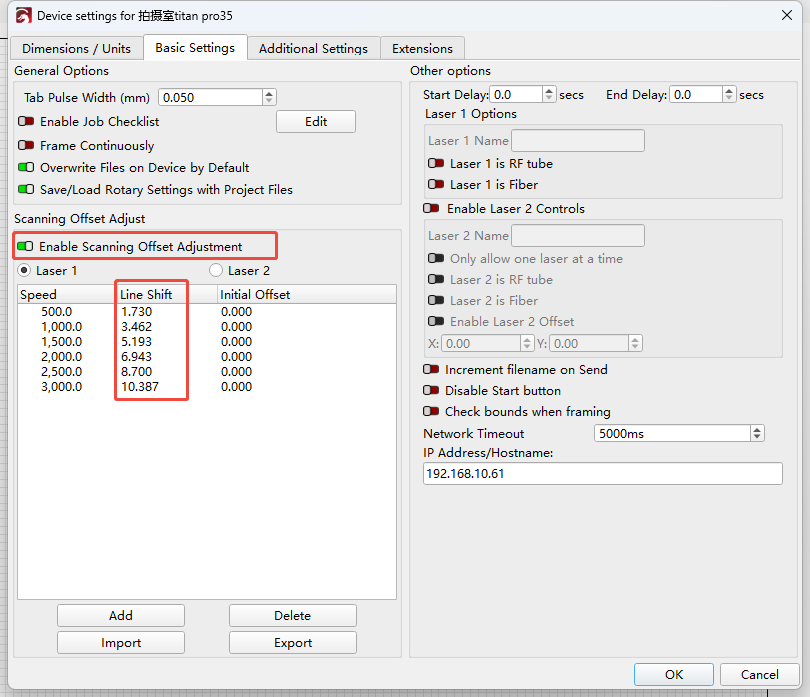
Enable Scanning Offset Adjustment in LightBurn and retain the default value for "Line Shift."
• Result: Ghosting in bidirectional engraving is eliminated; the image is centered, and both text and grayscale images appear clear and well defined.
• Note: With this setting, unidirectional engraving may still exhibit an overall leftward offset. This is a LightBurn software compatibility issue that has been reported to LightBurn and is awaiting resolution. For this method, evaluate the result based on bidirectional engraving performance.
Follow the steps below:
1.In LightBurn, select the Fill layer to be adjusted. >>Enable Bidirectional Scanning >> Click OK. | |
2. Click the Tools icon at the location shown in the screenshot below. | |
3. Click Basic Settings >> Enable Scanning Offset Adjustment. >> Enter scanning offset value. >> Click OK. |
Note:The Line Shift field normally already contains a default value and does not need to be modified.
If no value is displayed, click Read after connecting the machine. If the value is still not displayed after clicking Read, manually enter the value indicated on the golden calibration card supplied with the machine. Refer to this https://support.thunderlaser.com/portal/en/kb/articles/how-to-add-reverse-compensation-setting-in-software#Before_you_use_the_laser_machine
Method B: Primarily Using Unidirectional Engraving for Fine Detail and Small Text
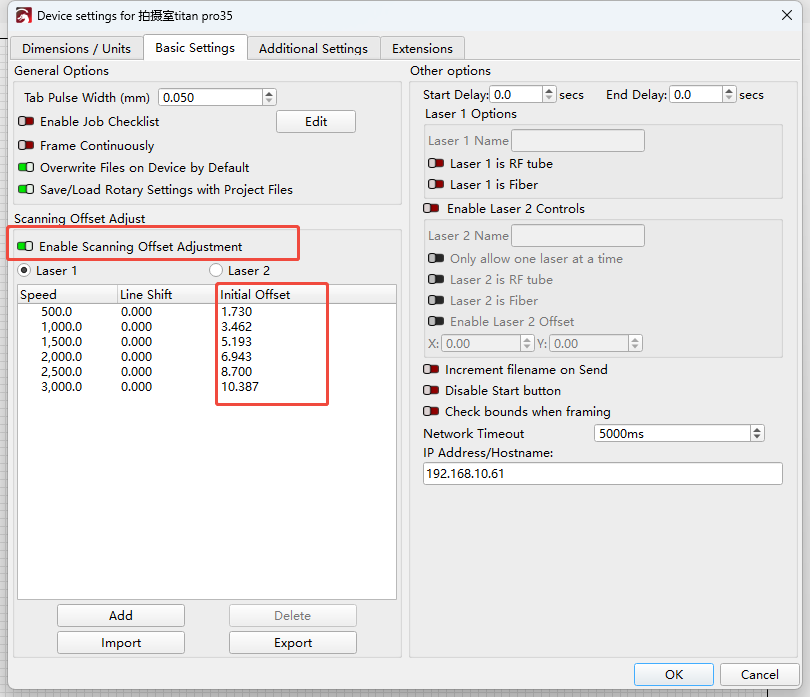
Transfer the compensation value from "Line Shift" to "Initial Offset"; in other words, use Initial Offset with the default Line Shift value set to zero.
• Result: The image remains centered during unidirectional engraving, with no overall displacement, and strokes in small text are more uniform.
• Note: With this setting, ghosting may reappear during bidirectional engraving. Evaluate the result based on unidirectional engraving performance.
Follow the steps below:
1. In LightBurn, select the Fill layer to be adjusted. Confirm that Bidirectional Scanning is disabled >> Click OK. | |
2. Click the Tools icon at the location shown in the screenshot below. | |
3. Click Basic Settings >>Enable Scanning Offset Adjustment >>Manually enter the default Line Shift value in the Initial Offset field and set Line Shift to 0 >>Write the settings >>Click OK. |
Comparative Test Results
Test Item | Image Offset in Titan Unidirectional and Bidirectional Engraving Modes | ||||
Machine and Firmware Information | Machine: Titan Pro 35 Mainboard Model: RDC6442G-LY-1G-GT5-DL (EC) LightBurn Version: 2.2.00 Mainboard Firmware Version: 07.17.17 (20260709) | ||||
Scanning Offset Adjustment Status | Unidirectional Engraving Test Result | Bidirectional Engraving Test Result | |||
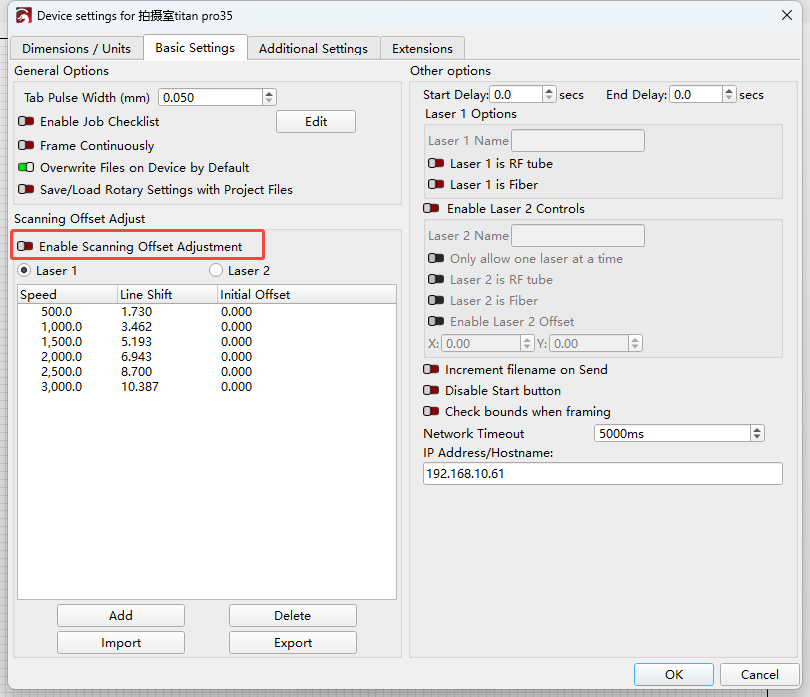
Disabled |
| Cutting layer shifted to the right | Image shows ghosting and misalignment | ||
Enabled: Line Shift at the default value |
| Cutting layer shifted to the right | Image centered with no offset | ||
Enabled: Initial Offset using the default Line Shift value |
| Image centered with no offset | Image shows ghosting and misalignment | ||
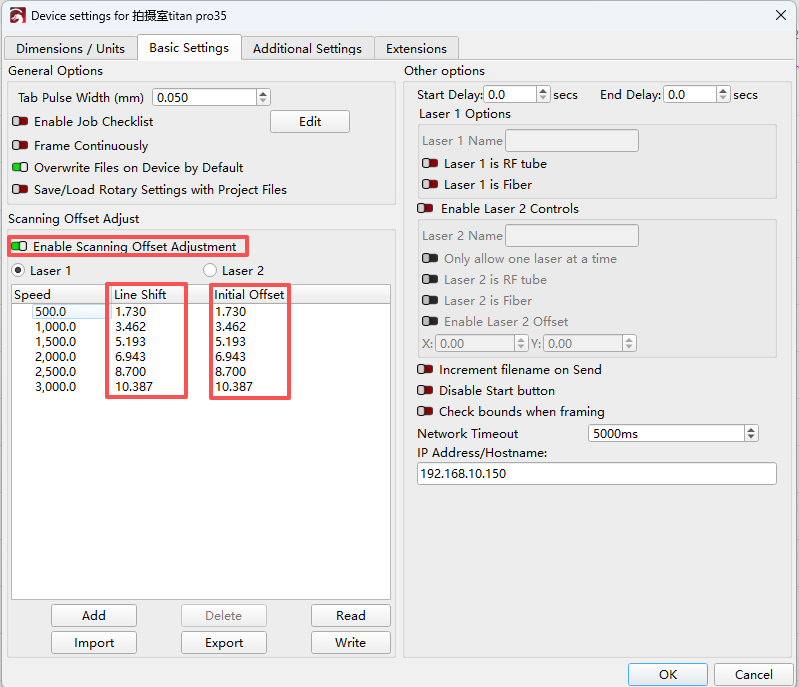
Enabled: Both Initial Offset and Line Shift use the default value |
|
| Image centered with no offset |
| Cutting layer shifted to the left |
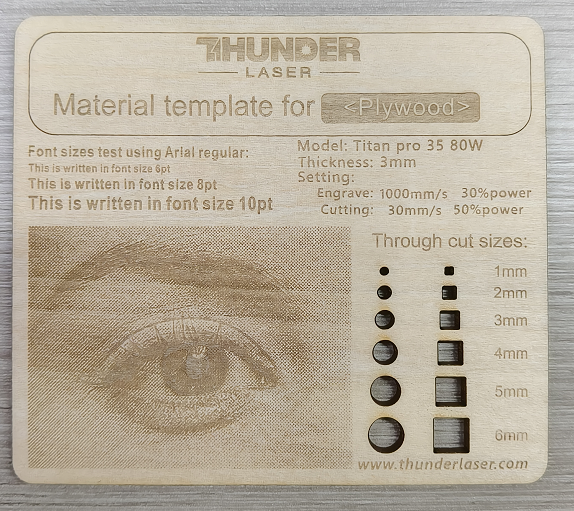
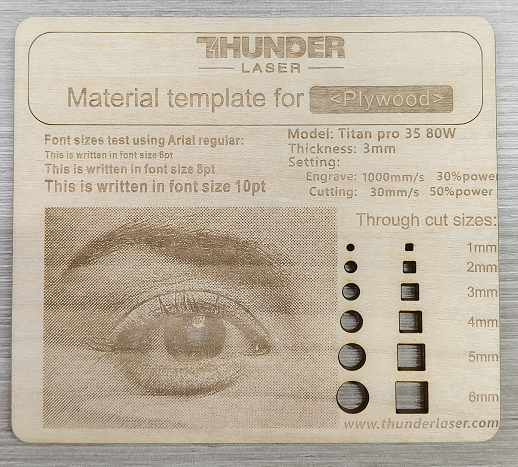
NOTICE: The X scanning buffer parameter can only be modified in RDWorks or LaserMaker currently.
Tests on the Titan Pro 35 also showed visibly slanted strokes in some text, including "Model/Thickness." This reduced the clarity of small lettering.
The issue was associated with the transition between scan lines during unidirectional X-axis engraving. The X scanning buffer parameter affects the buffer distance between scan segments. In comparative tests at 10, 20, 30, 40, and 50 mm below, 40 mm produced the straightest strokes and the best overall result. As shown in the test results below:
Note: The default value is 10 mm. Individual machines may vary slightly. If this issue occurs, adjust the parameter based on actual test results.
How to change the X scanning buffer?
Follow the steps below:
Open RDWorks, select User >> Processing>> Read>> Set X scanning buffer to 40 mm >> Write to save to the control board.
Important:Only adjust this parameter if the engraving result is unsatisfactory. Increasing the buffer distance may increase processing time, and the optimal value may vary slightly between machines. Test the setting on the affected machine and use the smallest value that produces a satisfactory result.
After modifying and writing the parameter to the mainboard in RDWorks, you can close RDWorks and return to LightBurn to test the engraving result with the updated setting. Alternatively, you can perform the test directly in RDWorks.
Note for macOS Users:RDWorks does not support macOS. Until LightBurn provides a compatible method for adjusting this parameter, macOS users may try using LaserMaker to modify the X Scanning Buffer parameter.
5. Routine checks
- After startup or a change in material or settings, engrave a short test before starting a production batch. Check position, ghosting, and stroke alignment.
- Keep the offset settings matched to the engraving mode: use the default Line Shift for bidirectional engraving; for unidirectional engraving, move that value to Start Offset and set Line Shift to zero.
- For small or detailed text, uunidirectional engraving with Initial Offset compensation may be used.
- If strokes remain slanted, test a longer X scanning buffer in RDWorks.
- After upgrading LightBurn or the mainboard firmware, it may be necessary to reinput the scan-offset compensation values and the X scanning buffer in RDWorks as described in Sections 3 and 4.
Still need help?
For specific technical questions or help requests, please open a Ticket with picture or video, so our Support team can assist you ASAP.
For the information provided in the ticket, please refer to this link:
Help Tech Support Troubleshoot Faster
End.